|
|
 |
The Pro Shop | |

NEW: Buy 2 items (or
more) and get a free
upgrade to 1st Class
UK postage.
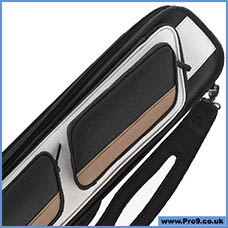
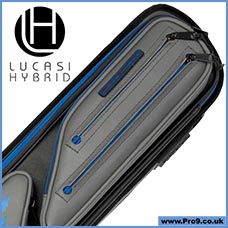
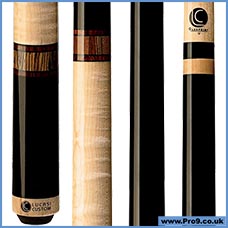
Lucasi
4x8 Soft Case
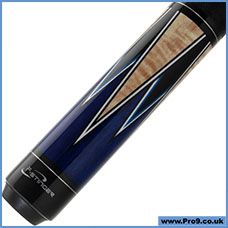
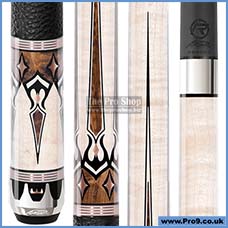
Fury
Stinger 4
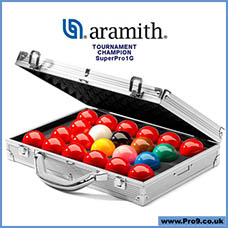
Aramith Snooker
Super Pro 1G
Viking
Cue Towel

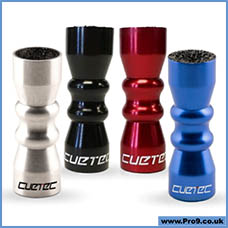
Cuetec Bowtie
Now in Colour!
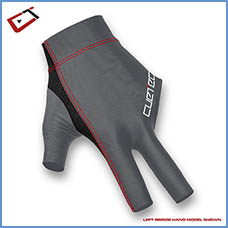
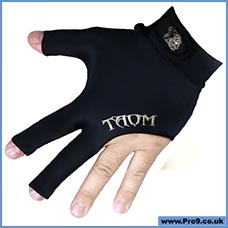
Cuetec Glove
New NOIR Colour
Black Ingot
Break Cue Tip
Pechauer Naked
Black Ice
Triple 60
Billiard Chalk
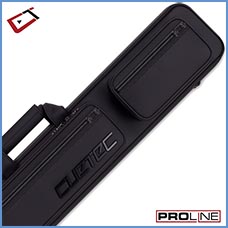
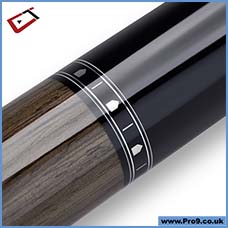
Cuetec Pro Line 4x8
Noir Limited Edition
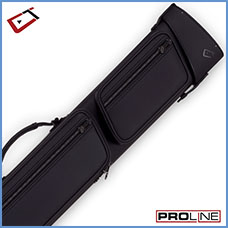
Cuetec Pro Line 2x4
Noir Limited Edition
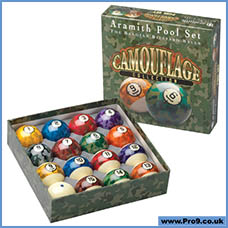
Aramith
Camouflage
Cue Cube
Dime Radius

Cue Cube
Nickel Radius

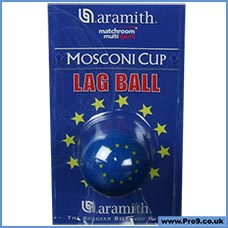
Mosconi Cup
Team Europe Lag Ball
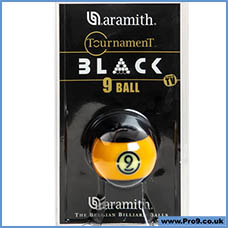
Aramith BLACK
Single 9 Ball
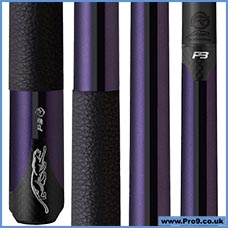
Predator P3 REVO
Purple Racer
Predator SP2
Limited Edition Nova
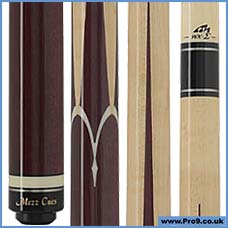
Mezz Sneaky Pete
Purple Heart 2
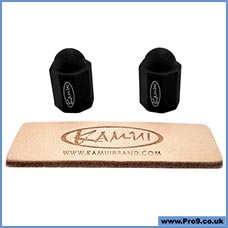
Kamui
Tip Protectors
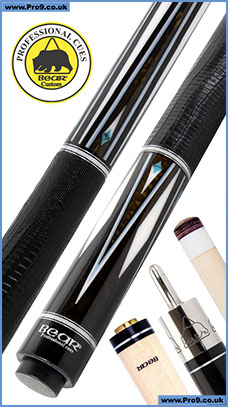
Bear
DB-8 / UniLoc Shaft
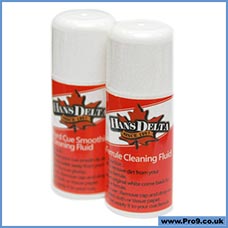
Hans Delta
Shaft & Ferrule Care
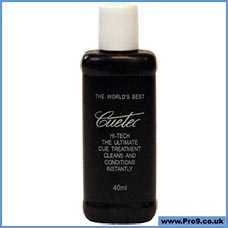
Cuetec HI-TECH
Graphite cue cleaner
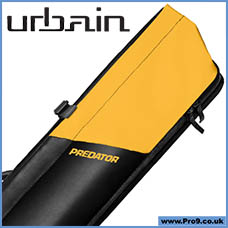
Predator Urbain
Black & Yellow 3x5
Predator Urbain
Black & Yellow 2x4

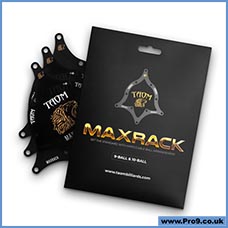
Taom MaxRack
Coming Soon!
Predator P3
Red Tiger
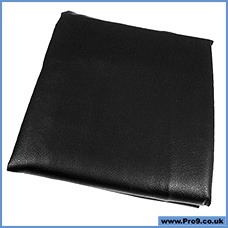
Table Cover
9ft Leatherette
Lucasi
Limited Edition LUX63

Lucasi
Limited Edition LUX58
Viking Two Feather
White Wolf
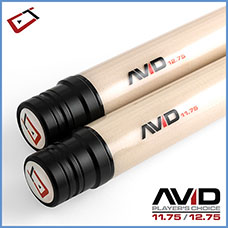
Cuetec AVID
Opt-X FK Blue
Pechauer
Rogue Carbon Shaft

Aramith BLACK
Orange 5 & 13 Ball
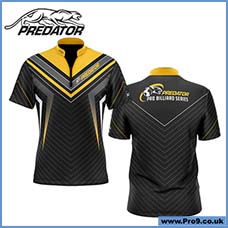
Predator
Pro Billiard Series
Sure Shot
Joint Protector Holder
Predator Air Rush
Red Revenge

Cuetec Pro Line 4x8
New GREY Colour
Cuetec Pro Line 4x8
New NAVY Colour
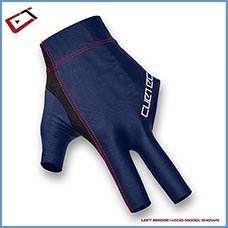
Cuetec Glove
New GREY Colour
Cuetec Glove
New NAVY Colour
Mezz
ASTR Series
Felt Saver
by Cue Candy
8pt Sneaky Pete
Maple and Rosewood
Last 4 Ever
Combo Tip-Tool

Desk Clock
Ideal Gift
BMC Meucci
Custom Casino 3
4pt Sneaky Pete
Leather emboss wrap
Predator Aspire
Weight Bolts

8pt Sneaky Pete
Leather emboss wrap
High End JPs
Engraved Aluminium
Predator K Series
Iconic Classics 2-3

Predator BK4
No Wrap/Linen/Sports
Kielwood Shafts
11.75mm Torrified

Taom Pro Tips
Back in stock
2 1/4" Table Bowls
Made in England
Mezz
Wavy Joint Protectors

Zan Premium
14mm Soft

Magic Ball Rack
Matchroom Grey
Predator
Black Shadow Hoodie
Predator
White Shadow Hoodie
BMC Meucci
Glass Rose - White

Predator
Crest Billiard Chalk
In Stock Now
Simonis 860
Cuetec AVID Proof
Brown - NW
Cuetec AVID
Low Deflection Shafts
Cuetec AVID Proof
Black - LTW
Predator Pure
3-pc Chalk Sampler
PRO
Inspection Machine
TAOM
Leather Chalk Pouch
HOW
Premium Chalk
Predator P3 Nova
British Racing Green

Moori
Billiard Glove
Predator
Pool Ball Carrier Case
Cuetec Cynergy
SVB Gen 1 Series

BRAD
Cue Scuffer
Aramith BLACK
Back in stock!
Aramith BLACK
Individual cue ball
Cuetec Pro Line
2x4 Hard Case
Cuetec
Alcohol Wipes
Cuetec
Acueweight Kit
Cuetec DUO®
Smart Extension

Cuetec AVID Era
6pt Sneaky Pete
Cuetec AVID Era
Florian Kohler
Cuetec Truewood
Cynergy Walnut
Cuetec Truewood
Cynergy Walnut
Cuetec AVID
11.75 & 12.75mm
Cuetec Truewood
Cynergy Leopard
Cuetec Truewood
Cynergy Leopard
Cuetec Billiard
Microfiber Towel

Cuetec Gloves
All sizes in stock!
Cuetec AVID
Surge Break Cue
Cuetec
Bullet Jump Cue
Pocket Lathe
Portable shaft rollers
Predator
Shorty + Sport Grip

Tiger
Silicone Grip
Longoni
Bohemia
Longoni
No Blue
Predator Throne
Series 3-1

Predator Throne
Series 3-2
Predator Throne
Series 3-3

Predator Throne
Series 3-4
Predator Throne
Series 3-5

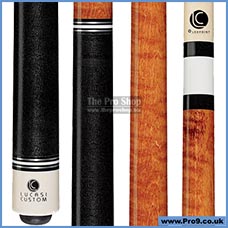
Lucasi Rival
3x4 Soft Case
Back In Stock!!!
Folding Cue Holder
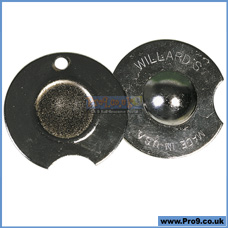
Willards Tool
Nickel and Dime
Taom
Midas Gloves
Mid-Cue Extension
1¾ Inch UniLoc
Predator
REVO Wipes
Jacoby BlackOut
Brown - No Wrap

Jacoby BlackOut
Grey - Sport Grip

Rasson Method
Last chance to buy!
5/16x18
Mid-Cue Extension

Predator REVO
SP2 Zebra 1
Fury
Telescopic Extension

Predator 2x4
Special Edition Case
Predator 3x5
Special Edition Case

Taom
Soft Chalk
Predator - Appleton
2x4 Hard Case
Predator Glove
Bold New Colours

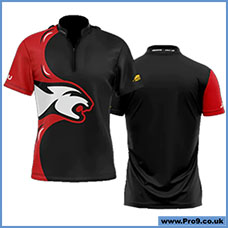
Predator Strike
Red Jersey
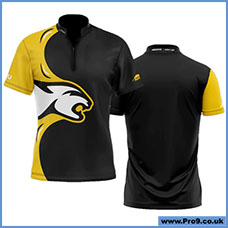
Predator Strike
Yellow Jersey
Brunswick K55
Cushion Rubber
Predator Air 2
Replacement Bumper
Tiger
Bridge Head
HOW Titan
Japanese Pig Skin
Predator 8 Inch
Exotic Extensions

P3 Bocote Radial
Leather Luxe Wrap

Magic Ball Rack
They are back!
Taom Magnetite
Round Chalk Holder
Predator K-Series
Classics 1-4
Predator K-Series
Classics 1-4
Kamui Athlete
Tip for Carbon Shafts

Predator Aspire
Predator ONE Shaft

Fury Stinger
X-Series Cues
Lucasi Air Hog 2
3-piece jump cue
Magic Rack
Tournament Edition
REVO BK RUSH
Break Cue Shaft

Mezz EC9 Cues
Buy NOW!

Kamui Kageki
Extreme Chalk
Predator TrueSplice
LE Gen 2 Ebony
Predator TrueSplice
LE Gen 2 Curly
Hans Delta
SK-BK1 Break Cue
Jim Rempe
Special Training Ball
Kamui - Training
Diamond Slicer
Exceed
Chalk Holder
Turtle Racks
10 Packs
ProPockets
Free post worldwide!
Pocket Lathe
Free post worldwide!

Predator
AeroRack

Great White Chalk
Thresher Blue
Predator 8-Point
Black/Green Veneers

Predator ARCOS II
Reserve Cue Ball
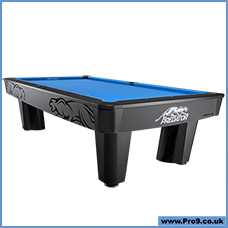
Predator APEX
9ft Pro Table
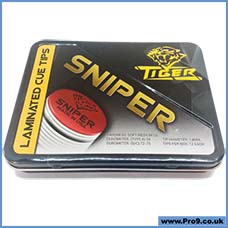
Tiger
Sniper Tip
Predator
Ikon4-1
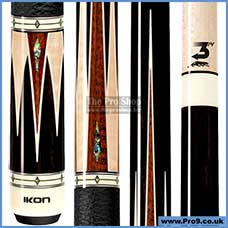
Predator
Ikon4-2

Predator
Ikon4-3
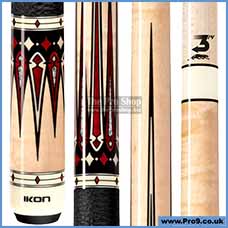
Predator
Ikon4-4

Predator
Ikon4-5

Kamui
Chalk Shark

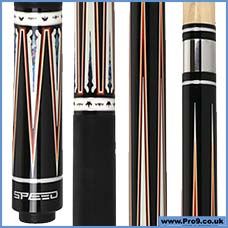
Speed 2
Affordable UniLoc
Mezz ZC-23
2 butt/3 shaft
Master Pro
K55 Cushion Rubber
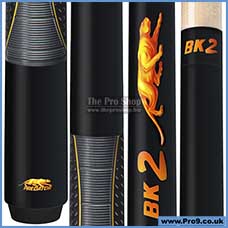
Rare Predator
Matt Black BK-2
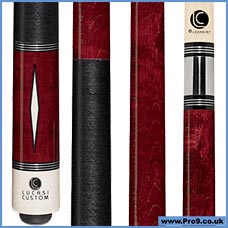
Lucasi Custom
UniLoc Joint
Lucasi Custom
UniLoc Joint
Lucasi Custom
3/8x10 Joint
Lucasi Custom
3/8x10 Joint
UniLoc Weights
Cartridge System

Mezz Avant
Dual Loading System

Magic Ball Rack
All-In-One
Kamui SAI
Control Break

Ignite 12.2 Shaft
Pre-order NOW!

Accu-Rack
Complete SET
Accu-Rack
DIAMOND 9
Accu-Rack
PRO 10
Predator Roadline
3x5 Black/Yellow
Predator ARCOS
Back in stock!
Aramith Pro Cup
Back in stock!
Taom
V10 Chalk
Tiger Corona
Leather Bridge
Taom
Pool Chalk 2.0
Taom
Pyro Chalk
Longoni
Cuetip Razor
Bulletproof
Break Cue Tip
Meucci Shaft
Carbon Fiber Pro
Predator REVO
11.8, 12.4, & 12.9mm

McDermott
6x6 Sport Case
Nicks Edge
Burnishing Papers
Pechauer
Jump Cue Natural
Pechauer
Jump Cue Black
Predator
Metro Cue Cases
Thor Hammer
Break Cue by Joss
Poison Armor3
2x4 Hard Case
Poison Armor3
2x4 Hard Case
Mezz Glove
Grey / Ambidextrous
BIG BALLS!
2¼" English Pool Balls
HXT-P1 PureX
Multi-Jump/Break
Tiger Icebreaker+
High Density Microcell
BK2 Re-Issue!
In Stock Now!
Arcadia Reserve
Tournament Blue
Predator Exclusive
Best value!
"Super Bat Wing"
The best got better!

Billiards 2021/22
Official Rules/Records
Predator SL 1
Valour Cue by Jacoby
NEW Improved
Magnetic Clip Chalker
TheProShop.biz
Free Post in Europe!
Order now! |
| |
Main Menu | |
| |
 | Unlocking the Safe - A series of articles by Blackjack David Sapolis |
Posted on Wednesday, July 12 2006 @ 13:31:58 UTC By admin |
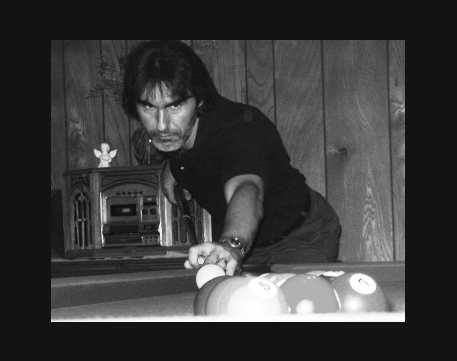
 "Blackjack" David Sapolis "Blackjack" David Sapolis
Professional Pool Player, Instructor, Author
Currently residing in El Paso, Texas
Originally hailing from:
Live Oak
Orlando
Florida
USA
E-mail: blkjackds12@yahoo.com
12 July 2006
The first of a series of articles from instructor and author "Blackjack" David Sapolis.
This excerpt, from his latest book, "Lessons in 9 Ball" is reprinted here with permission.
Contact David directly for details of how to purchase his books.
Factors of Proper Execution
The safety is one of the most complex subjects in 9 ball. If you lack the ability to properly execute safeties, your game will surely suffer.
Many beginners fail to recognize the safety option, and tend to go for the shot at all costs in all situations. Just as there are factors to running the rack, there are factors that come up when you are faced with no shot options.
When faced with no option to pocket the object ball, we need an alternate solution that gives the table back to our opponent - but at the same time limits his options.
Click on "Read More..." for the details.
The factors that surround the execution of the safety are:
Table Speed
The Layout
Your Ability To Remain Calm when faced with less than desirable situations.
Table Speed
To properly send the balls to the desired locations, you need to know how the cloth is reacting to the surroundings and your stroke. Prior to starting the match, ensure that you check the cloth speed. Many tables play fast in dry heat in areas of the Southwest, but tables are sticky in the Southeastern States such as Louisiana and Florida due to the humidity�s effect on the cloth. Rails react differently in different weather also. In areas of the North and Northeast, I believe the table speed is more predictable due to the absence of humidity and dryness. Though many rooms attempt to protect the playing area with different climate control methods, I believe that areas such as Florida will always pose a special challenge due to the factors that the table conditions throw at the player.
When dealing with safeties, we need to gage the table speed for two important reasons:
1) We need to place the cue ball or object ball EXACTLY where it needs to be placed
2) We need to know how we are going to get there
It is one thing to know how and where the ball is going, but we also need to properly execute it. Testing a few multi-rail position shots prior to the match, or performing basic patterns and drills should give you a basic understanding or how the table is reacting. Understand that when playing pool at the top level, you need to have a good working relationship with the table you are playing upon. Understand how the table surface is performing and reacting, learn the speed of the rails, the cloth, and the pockets. Inspect the table for divots and settling around the racking area. Knowing the table is essential to winning any pool game.
Layout
When executing a safety, it is essential to inspect the layout of the table in relation to what you are going to do. Walls and clusters are obvious targets to send the cue ball or the object ball, but certain factors will determine which of the two you will send there. To determine which, we look at what the problem is in the situation we are faced with. Here are some questions we should ask when faced with the decision to play safe:
Am I faced with a positional dilemma?
Am I faced with a difficult shot dilemma?
Did I get in the wrong side of the ball?
Am I hooked?
Is the ball I am facing hidden?
Does the object ball have no pocket options?
Identifying the problem is the FIRST STEP in finding a solution to the problem.
Your Ability To Remain Calm
Many players get flustered at the first sign of trouble. To be able to make sound, sensible decisions that aid us in our quest, we need to remain calm when faced with adverse conditions at the table. Your ability to remain calm will reflect in your decision-making and the execution of your safety. If you are angry, flustered or nervous, your chances of being successful are extremely limited. Safeties are not only tools to use on your way towards the winner�s circle; they are also tools of frustration. You can either let the situation frustrate you, or you can use the situation to frustrate your opponent. Dwelling on helplessness solves nothing. Getting angry and reacting to the situation emotionally (as opposed to effectively) exposes a weakness to your opponent. Learn how not to react emotionally and learn how to react effectively. Answer every shot with a shot of your own. Never answer his shot with an emotional outburst. Controlling your emotions and remaining calm throughout the situation will help you think more clearly throughout the game and the match.
When To Play Safe
Knowing when and when not to play safe is half of the battle. Many players play safe in different situations and what they do depends on their skill level, their shotmaking ability, and their confidence. As I touched upon earlier, many younger players tend to �go for everything� and rarely play safe - and when they DO play safe - they execute it poorly. Familiarizing yourself with the different factors of when and when not to play safe is essential to making the proper choice.
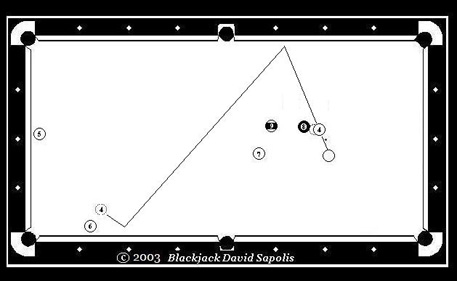
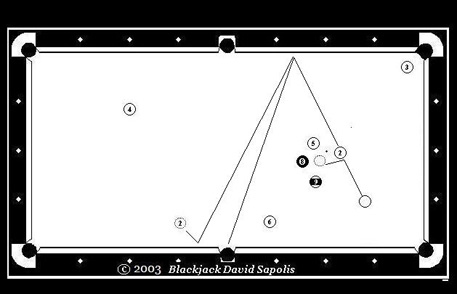
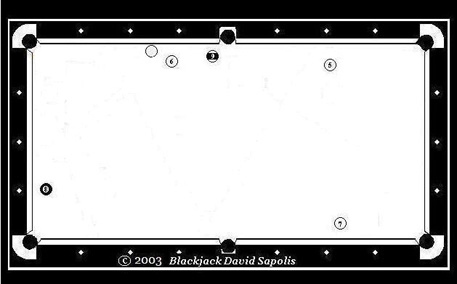
One of the classic examples is after the break. Your opponent has broken the balls and has left you no shot on the 2 ball as a result of pushing out. The 2 ball is stranded on the end rail. There is a very low percentage bank shot on the 2 ball cross-table. (SEE DIAGRAM BELOW)
That is the only pocket availability option that we have on the 2 ball - and even then - we need some help from the 8 ball. There is also a cluster caused by the 4, 5, & 6. There is a mini-cluster caused by the 7 and the 8. We have the choice to:
a) Go for the bank shot
b) Pass the shot back to our opponent
c) Control the cue ball and place it behind a cluster
d) Control the object ball and place it behind a cluster
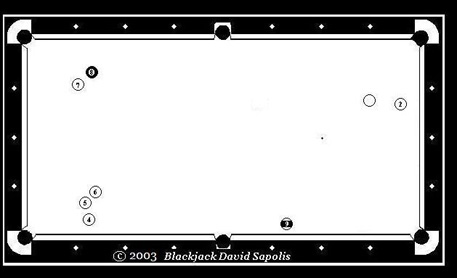
So what is the correct choice? Let�s break it down by looking at each available option and make our decisions by choosing the shot that holds the best percentages for success. We will first Identify whether or not there is a good chance for a run out. To do this, we must imagine that we have ball in hand on the 2 ball. We look to see if any ball is in trouble. The 5 ball causes a problem, but if we get right on the 4 ball and stay on the lower rail, the 5 ball goes in the top left corner pocket. The key to running this rack is getting straight on the 4 ball for a stop shot so that we can pocket the 5 ball. With the 5 ball gone, the 6 ball is a duck in 4 out of 6 pockets. The 7 and 8 are a mini-cluster, but both pass into the top left corner pocket very easily. Evaluating this layout tells me two important things:
1) There is a possibility for a run out
2) Whoever maintains control of the game CAN and WILL get out
3) My opponent should have played safe instead of rolling out - HE just made an error
4) I am in control of the table now and I need to make it count - and MAINTAIN control
Notice that I mentioned �maintaining control�. By that I mean that we need to be the �actor� as opposed to being the �reactor� during this game. He has pushed out and left us a lousy shot on the 2 ball. We can hit the 2 ball, and we have two separate safety options caused by a three ball cluster and a two ball mini-cluster. The 7 and 8 balls are more of an obstacle option than a cluster as the balls can be pocketed from where they are. The 4-5-6, though classified as a cluster, can be dealt with if handled with care. The 4-5-6 is also our largest obstacle on the table.
Do we bank the 2 ball?
Pocketing the 2 ball by banking it cross table relies on many factors. We first have to determine whether or not the 2 passes by the 8ball. We can obviously see that it will not pass by the 4 ball. The 2 does pass by the 8 ball, so we must now look at the position we will need to make the 4 ball. The bank on the 2 ball will send our cue ball to the bottom rail, then the side rail, and out towards the center of the table. This will be unavoidable, as we will have to surrender the cue ball to the elements of the table due to the angel we have on this bank shot. That is unavoidable. This will leave us too much angle on the 4 ball, thereby eliminating an easy shot on the 5 ball. Already we can see the chances of a run out slipping away. By evaluating this option, we have determined that there are too many problems ahead of us if we take this option - therefore it should be avoided.
Do we pass the shot back to our opponent?
What if he has discovered the safety option as well? I�m not going to hand it back to him on a silver platter. He just made a tactical error and I should make him pay for it - dearly. We can eliminate this option as well.
This leads us to a crossroads that we come to with each safety option. We can either control the cue ball or the object. Always choose one or the other and avoid controlling both at the same time.
By our evaluation, we can see two walls. We should look at the LARGEST obstacle and see what our options are.
Can we successfully place the 2 ball behind the 4-5-6? Not very likely. From where we are, we can place it in front of the 4-5-6 cluster - which DOES cause problems - but that is not the wisest choice. Why? Because if the 2 ball is placed in front of the 4-5-6 cluster it can be used as the lead combination ball. If we do not execute it properly we can leave the 2 ball in front of that corner pocket. Fro there he will be able to use the 2 ball quite easily to break up that cluster with the ensuing cue ball action. We could also tie up the 2, (or tie up the other balls) and inherit that problem somewhere down the road. Eliminate that option as well.
Now let�s look at the shot that is illustrated.
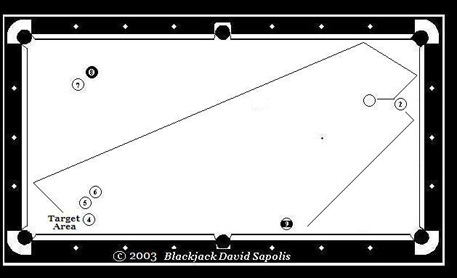
It is a safety that is executed quite easily and it is a high percentage shot. Also, if we are unsuccessful, we have our opponent shooting AWAY from the required position on the 4 ball. The rule I follow in this situation is to have him shooting AWAY from the straight position that is required on the 4 ball. Unless he gets this position, he will not have a good shot on the 5 ball. This means that he should be shooting towards the upper pockets and the pockets on the right (in the diagram). Even if our execution varies slightly from the illustration, the 2 ball becomes a locking mechanism rather than the key that opens up the rack for our opponent. Even if the 2 ball is behind the 9 ball and he can make it - his chances will be slim as long as he is you have his natural cue ball position going away from the 4 as he pockets the 2 ball.
This situation occurs very frequently during safety battles. As long as your opponent is shooting away the required position YOU remain in control of the situation as the actor, not the reactor. If we lock our opponent up behind the cluster, he will be forced to kick 2-3 rails to make contact with the 2 ball. Ensuring that the cue ball gets close to the cluster, you will have taken away the jump shot from his options. By simply evaluating all of our options, we have eliminated the poor choices and identified their disadvantages and subsequently identified the percentage option and all of its advantages. Why not go behind the 7 and the 8? This is explained later on in the diagram entitled �Going To Jail� where we will revisit this shot and evaluate it again.
During this shot, we evaluated the situation and into consideration everything that could go right and wrong with every option that we had. Never eliminate an option before weighing the advantages and disadvantages carefully. Weigh each option carefully and as time goes by you will amass a large inventory of knowledge and experience that will aid you in your future endeavors. Many situations revisit us from time to time. Though no two layouts are exactly the same, there are situations that are similar. The more experienced you are at thinking things through, the more apt you will become to making the correct choice when faced with difficult situations.
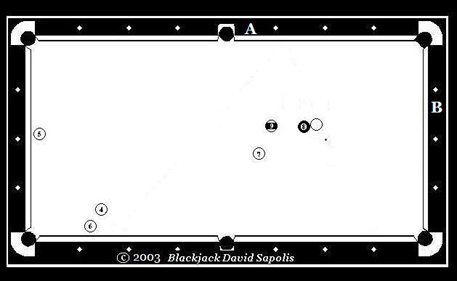
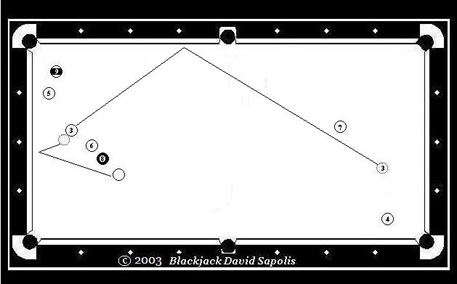
Offensive Safeties
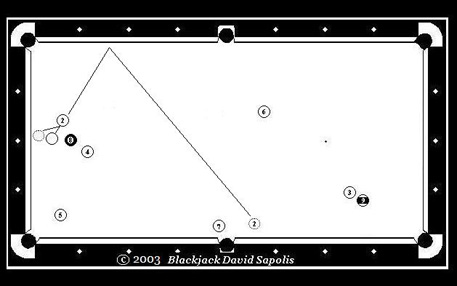
Offensive Safeties are shots that hide the cue ball or object ball from your opponent while at the same time giving you an advantage on the resulting ball in hand. In this situation, we have no shot on the 2 ball. When we look at the table, we see that the 3-9 combination is sitting pretty up in the corner. If we allow our opponent to see the 2 ball, it is a safe bet that we will lose this game.
The shot illustrated shows an offensive safety. We are hiding the cue ball behind the 8 and 4. With the proper stroke, we send the 2 ball in front of the 7 ball. Where the 2 ball ends up is not as important as hiding the cue ball - therefore we control the cue ball - not the 2 ball. The resulting ball in hand leaves you in very good position to win this game.
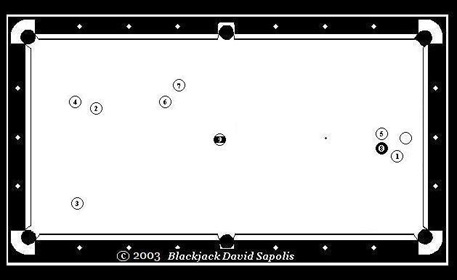
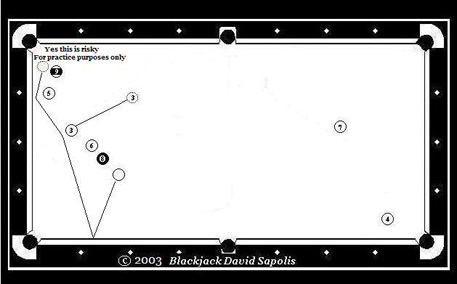
Defensive Safeties
For whatever reason, you have gotten this shape on the 4 ball. The 7 ball is blocking the cross side option, and from where your cue ball is, you have no pocket availability options for the 4 ball. The key here is to hide the cue ball only. This is a defensive move that opens up an offensive option.
We have hidden the cue ball behind the 8 ball. Even if our opponent makes contact with the 4 ball he will be sending it towards a pocket (off of Rail A). If he chooses to go to Rail B, he will have the 8 ball as an obstacle and he will be shooting at it awkwardly. In this situation you have limited his offensive options. When looking for a place to send either the object ball or the cue ball, always look to send either to a location that offers your opponent the fewest offensive options. Limit his options and increase yours. This shot also opens up the table - for YOU!
Duck or Hide?
What do you do here? Look at this situation carefully. It is possible to make the 1 ball into pocket �A�. Do we have anything to gain from that? Not really. We�ll just break up the 5 and 8. We can also try to bank the 1 ball cross-side, but once again, the position on the 2 ball leaves a lot to be desired. If we stick the cue ball behind the 8 and 5, chances are we will have nothing to gain by getting ball in hand - seeing we have two sets of clusters. So what do you do?
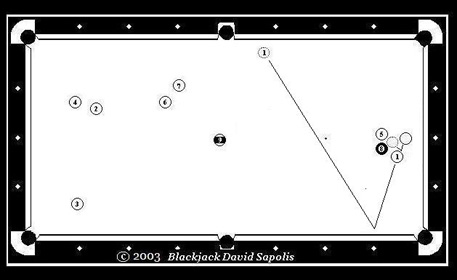
This is a hide shot. Simply hide the cue ball behind the 5 and 8. Even though you do not have much to gain by getting ball in hand, you remain in control. You can try to lock him up again on your next shot. That way you keep him kicking at the 1 ball.
Two Way Shot
This is an example of a two way shot. In this situation, we can attempt to pocket the 2 ball cross side. If we make the 2 ball we still have position on the 3 ball. If we miss the bank on the 2 ball, we have hidden our opponent (as diagrammed below).

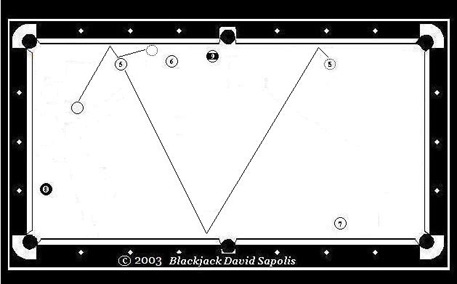
Kick Safeties
There are a couple of ways to hit this shot. Above, we hit the 3 ball full and send it one rail between the 7 and 4 balls. This will leave the cue ball behind the wall made by the 6 ball and the 8 ball. Below, We come one rail, hitting the 3 ball one rail and out of the way. This will hide the cue ball behind the 5-9 cluster.
Kick Safeties
In this shot we do not have the proper angle to bank the 5 ball cross side. By using this kick safety, we open up the table while at the same time making life miserable for our opponent.
Taking The Jump Shot Out of The Equation
When executing a safety where you are controlling the cue ball, it is important to find �traps� where our opponent�s options are limited. Below is an example of good cue ball placement. It is extremely important to take the jump shot out of the equation if at all possible.
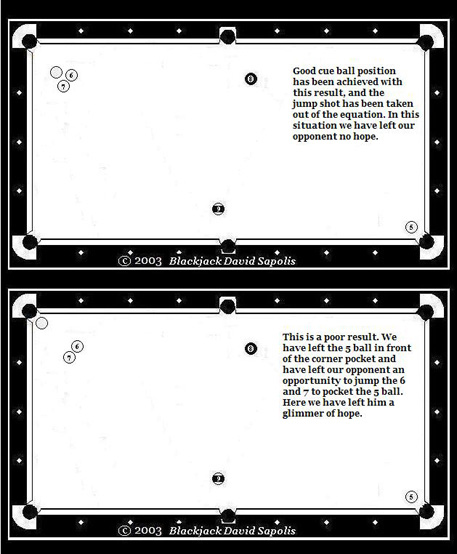
Taking the jump shot out of the equation is one thing, but taking all hope for survival out of the equation is the ultimate goal. If there is one area of the game where we can find our opponent�s weakness, it is with a good safety battle. If I am able to lock him/her up, and he/she misses a one rail kick attempt, then I have detected a weakness. Armed with that information, I will have my opponent revisit that nightmare over and over, as often as I possibly can. This can also be a weapon for your next match up with this opponent, or a way to test him to see if he has strengthened that area of his game.
If there is one thing that I cannot stress enough about safety battles, it is to remember what works and what does not work. I would not leave Efren Reyes an easy one rail kick with the object ball sitting in front of the pocket. There is probably a 99.999% chance that he will not feel the least bit threatened at my weak attempt at locking him up. When I am playing safe, I want my opponent to know that I mean business. It�s nothing personal. I want to either run racks, or when faced with no shot - I want to leave him absolutely no daylight whatsoever. I always want to execute a safety with killer instinct. Passive, weak, desperate, or timid safeties will possibly give control of the table back to my opponent.
Remember that we always want to remain in control and be the actor, not the reactor. You can do this by not only leaving hi shot-lee, but option-less as well. The less options he has, the more helpless he will feel. This can work both ways. If you are the guy that is locked up, do whatever you have to in order to regain the advantage. If you cannot see the object ball, do everything in your power to at least make contact with it legally. Even if you leave him a straight in shot, it is much better than giving your opponent ball in hand. Above all else, choose your battles carefully. Do not play safe unless you absolutely have to. Weigh your options and play the percentages. Be a smart player as opposed to being a bold player. Apply what has been learned in this book, and you will start winning games that you could not win before.
Excerpt from Lessons in 9 Ball
by "Blackjack" David Sapolis
All copyrights are owned by David Sapolis. No duplication is allowed without permission.
David Sapolis has been playing pool since he was able to see over the table and was trained by the late BCA Hall of Fame Member Cisero Murphy.
He has competed professionally since 1980. He currently plays on The UPA Tour, The Florida Pro Tour, and many regional tours in the United States. He coaches many players, including several top professionals on the UPA, IPT, and WPBA Tours. David is sponsored by Blackjack Billiards Inc., Dark Heart Publishing, and he endorses SlipStic .
David has written several books on pool including "Stroke of Genius" and "The Growling Point". More recent books include "Building The Perfect game" and "Lessons in 9 Ball".
None of David's books are available on Amazon. The only way to get them is buying direct - they can be made available through a downloadable pdf file / e-book as well as traditional paperback.
He is currently busy getting players ready for the impending North American Open IPT event, and is also practicing a lot for regional 9 ball tournaments in Texas.
|
|
|
|
9 Ball | |
|
|
|

PRO9 has established an outstanding reputation as Europes No.1 source for information on American Pool in the UK and Europe.
Upcoming tournament details, prompt match reporting, exclusive images by talented photographers, superb articles by expert pundits, active pool related forums, player profiles and a very sophisticated membership - basically, an incredible information resource for the American style game in Europe.
Since it launched, PRO9 has become compulsory reading, not just for the UKs pool players, but to hundreds and thousands of pool obsessives from around the world every single day.
PRO9s members range from professional pool players, cue-sports enthusiasts, club managers, tournament organisers, pool fans and aficionados, as well as various "movers and shakers" in the cue-sports field, including entrepreneurs in the wholesale and retail sector, as well as magazine editors and television sports promoters.
Growing more and more popular every single year, PRO9 is the best placed vehicle for the promotion of your pool club, billiards brand, associated products, services and opportunities in the truly massive pan-European billiard market.
If you qre reading this, you should check out www.Pro9.co.uk for yourself!
Please use these logos and text in your links to www.Pro9.co.uk - thank you.

Forum rules: No advertising, no links to businesses/shops/eBay, no swearing, respect our sponsors and each other, no hate!
Flag counter installed Monday 11 November 2013
All logos and trademarks in this site are property of their respective owner.
The comments are property of their posters, all the rest © 2006-2020 by Big Dave at Pro9.co.uk.
This web site was made with myPHPNuke, a web portal system written in PHP.
myPHPNuke is Free Software released under the GNU/GPL license.
Anyone read this bit down here???
You can syndicate our news using the file
backend.php or ultramode.txt
|
|
|
|
|
Page took 0.117778 seconds to load.
|


Comments